Show Your Best Side: Tips for Improving Your Video and Audio
Here are some tips for creating the right environment and some best practices for presentating online.
Your Environment
Your Background
Anything behind and around you should be neutral and not distracting, especially for a presentation to a group. Think light-coloured wall vs a window, bookcase, the ceiling (see framing tips and positioning tips below), or wall hangings. Remove any clutter in the shot. The point of the audience’s or other attendees' focus should be on you, not your background.
Your Audio
The microphones in most webcams are optimized to pick up your voice when you are within about .5m to 3m of them; this is typically where you will be positioned, so no further adjustment of the microphone is usually necessary. Likewise, headset microphones are optimized to pick up your voice at a distance closer to your mouth. In both cases, it is important to test your audio using the online meeting's check-audio function (often available before you join the meeting), but in most cases, leaving this on the auto setting is adequate. During the meeting, try to enunciate clearly, but there is no reason to shout to make yourself heard.
Your environment should be as quiet as possible. Although we cannot always eliminate noise, do listen and try to do your meetings and presentations from a place where any construction noise, sirens, or household noise is minimal. You may not be able to get away from small children in your home, but if you have older children that are playing noisily nearby, try to find somewhere quieter to lecture. Offscreen noise, espcially shouting, can be very distracting to an audience.
Remember That You Are Visible
If your video is on, do keep in mind that others may be able to see you for the duration of the meeting, even if you do not speak. Be aware that whatever you are doing, be it eating, taking phone calls, doing other work on your computer, may be seen by others (note, however, that no one will be able to see your screen unless you share it).
Framing, Positioning and Lighting Tips
Level With Your Eyes
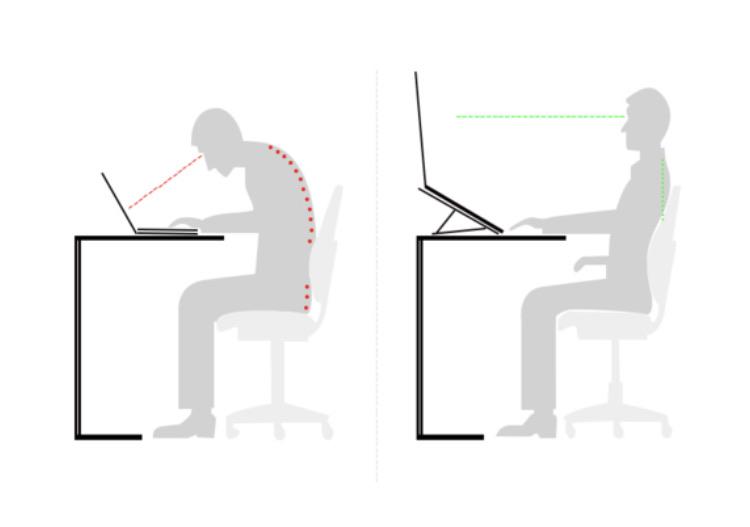 Position your camera so that it is approximately level with your eyes. If you are using a laptop, it may need to be raised about 30cm to achieve this; prop it up with books or a box so that the screen is vertical, not on a slant. Tilting the screen back results in an unappealing shot of you bending over the laptop and brings attention to your ceiling. If your ceiling comprises the bulk of the background, raise your laptop!
The image below shows someone hunched over their laptop. To avoid this, raise the laptop so the camera is level with your eyes. Bonus: it's much better for your posture as well.
Check Your Lighting
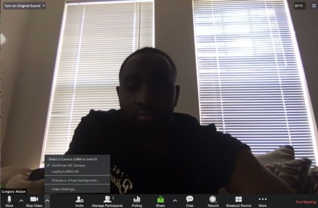
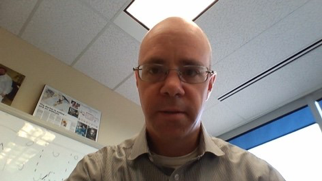
Position your camera so your back is not to a window (or in a dark room, not to a bright light), in order to avoid being backlit. The camera exposes for the bright light, resulting in you being underexposed and appearing silhouetted.
These images show the subjects being backlit, resulting in the camera exposing for the bright light instead of the subjects. Do not have your back to a window or bright light. Make sure there is enough light on your face. You may need to position a lamp in front of you or position yourself to face a window, so light falls on your face.

A Good Camera Image
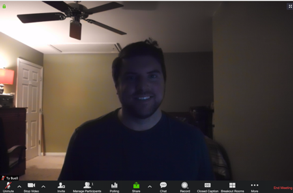
This image shows a well-lit subject with a neutral background, the camera approximately eye level, and neither too close nor too far from the camera.
Zoom Settings
There are settings in the Zoom app that can help improve your image. There is a good overview at this site: https://www.guidingtech.com/helpful-zoom-video-settings/